Prepare a ISO-file
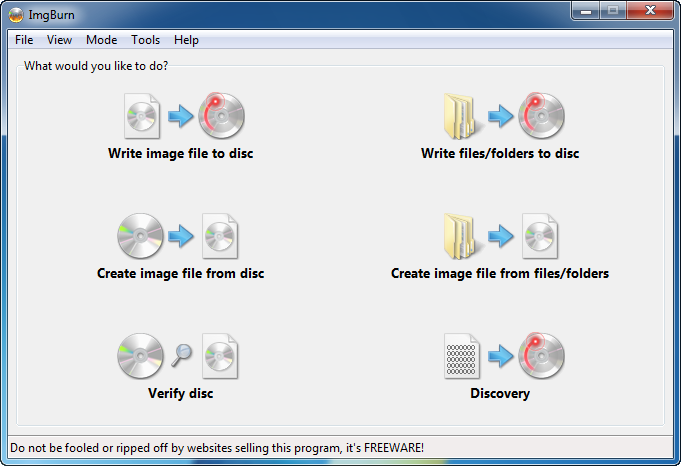
To install Windows 7 from an USB memory you will first need the Windows installation DVD as an ISO-file. If you downloaded the Windows DVD from a website like for example MSDNAA you probably already have it as an ISO-file. The file will have a little grey CD as icon and if you can see the filename extension it should end with ".ISO".If you have your Windows installation as a DVD you need to save it to your computer as an iso-file first. This can be easily done with a tool like ImgBurn. Just download and install this tool for free and then you simply select "Create Image file from disc" as seen here:
The USB-stick needs to be at least 4GB and you should know that all the files on it will be removed so be sure to copy all the files you want to save to something else then put the memorystick in your computer.
Use the Windows 7 USB/DVD download tool
The next thing you need is the Windows 7 USB/DVD download tool which can be downloaded directly from Microsoft here.Install the tool and start it, in the first screen you will be asked to choose your iso-file. Click browse and choose the file you preaperde and click open, then click Next.

In the next screen you are asked if you want to make an installation DVD or USB, choose USB.
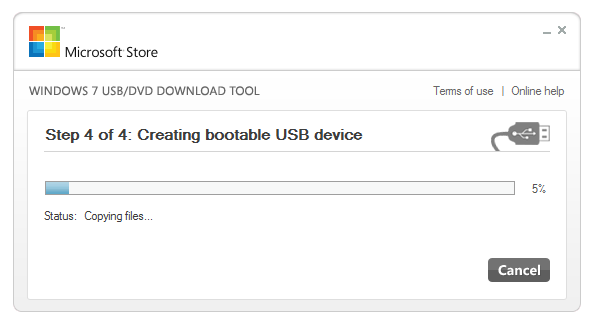
The next screen will ask you for which drive you want to but the Windows installation in, choose the USB you have in your computer and hit next, you will get a warning that all data on the USB will be deleted, click OK. The Windows installation files will now be transferred to the USB-stick.
Boot your computer from USB
When the file transfer is complete take the USB-stick and put it in the computer you want to install.If the computer have a boot-menu you can enter that to choose to boot from the USB, when you turn the computer on, look for something about "Multiboot" or anything with the word boot followed by a F-button. Usually its F12 but can be other buttons to depending on the motherboard. Press F12 and you should see a menu that looks something like this:

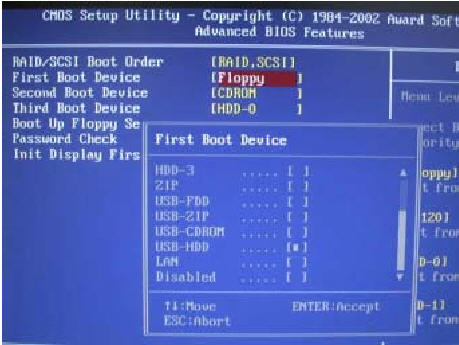
If your motherboard don't have a bootmenu you will need to enter BIOS to chose USB as your primary boot device. Turn your computer on and enter BIOS by pressing F2, F8 or DEL depending on your motherboard (you will see a message telling you which button to use directly when you start your computer)
In BIOS, find the boot menu and change the primary boot device to USB-HDD or Removable device or something similar by pressing + until its at the top. It should now look something like this.